Introduction
This post will discuss the most frequent problems with the A4988 stepper motor driver and provide workable fixes to ensure seamless operation. Knowing these typical issues will help you save time and effort while configuring your stepper motor controller for the first time or debugging an existing setup. Additionally, we’ll examine current limitation, microstepping, and the function of motor driver chips in guaranteeing peak performance.
Let’s get started!
Understanding the A4988 Stepper Motor Driver
One of the most often used solutions for managing stepper motors in a variety of settings, such as 3D printing, CNC machines, and other automation systems, is the A4988 stepper motor driver. Through the use of a stepper motor, electrical signals are transformed into precise movements. However, common problems can result from incorrect wiring or configuration.
Microstepping: By breaking up each whole step into smaller ones, the A4988 driver’s support for microstepping reduces vibrations and enables smoother motor movement. Unpredictable motor behaviour may result from improper setup.
For more details on setting up your stepper motor controller, visit our guide on microstepping in stepper motors.
How Does the A4988 Work?
Here’s the magic behind the A4988 driver module:
- Input Signals: Your Arduino sends step and direction signals (e.g., “move 200 steps clockwise”).
- Microstepping: The A4988 splits each full step into smaller steps (like 1/16th of a step) for ultra-smooth motion.
- Power Delivery: It sends the right amount of current to the motor coils to spin it accurately.
Key Components:
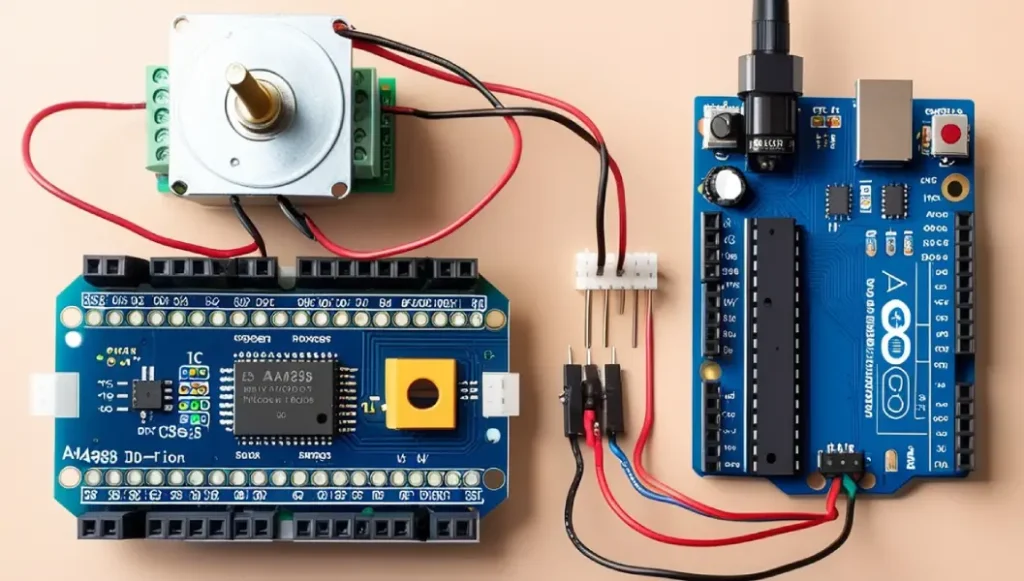
- Driver IC: The brain that processes commands.
- Adjustable Potentiometer: Sets the current limit to match your motor.
- Microstep Pins: Let you choose step resolution (full, half, quarter, etc.).
Key Features and Benefits
| Feature | Why It Matters |
| Microstepping | Smoother motion (great for 3D printers). |
| Adjustable Current | Prevents motor overheating. |
| Wide Voltage Range | Works with 8V-35V power supplies. |
| Overheat Protection | Shuts down if it gets too hot. |

Top Benefits:
- Precision: Move motors in tiny increments.
- Affordability: Costs less than a pizza!
- Ease of Use: Plug-and-play with Arduino.
Where is the A4988 Used?
- 3D Printers: Controls precise filament feeding.
- CNC Machines: Guides cutting tools accurately.
- Robotics: Moves robot arms or wheels smoothly.
- DIY Projects: Perfect for homemade gadgets like camera sliders.
Real-World Example:
A hobbyist in Germany used the A4988 driver to build a solar-powered robot that follows sunlight autonomously!
Common Issues with A4988 Stepper Motor Driver
Overheating and Current Limiting Issues
Overheating is one of the most common issues with the A4988 stepper motor driver, particularly when the current limiter is not adjusted correctly. The driver may shut down if your stepper motor overheats due to excessive current consumption.
Solution: As directed by the manufacturer, appropriately modify the current limiting. To keep the driver cool, make sure to utilize a fan and heatsink.
Motor Stuttering or Lack of Movement
The motor stuttering or not moving at all is another frequent problem. Incorrect wiring, voltage, or current settings are frequently the cause of this issue.
Solution: Verify that the stepper motor electronics are installed correctly by checking all electrical connections twice. Additionally, confirm that the stepper motor’s voltage and current ratings correspond to the A4988’s specifications.
H3: Inconsistent Movement or Jittering
When the needs of the motor and the stepper motor controller are not met, jittering or inconsistent movement may result. For example, a problem with the microstepping setup may be the cause of the motor’s uneven steps .
Solution: Modify the A4988 driver’s microstepping parameters. Make sure the driver can handle the motor’s voltage and current.
Best Practices for A4988 Stepper Motor Driver Setup
To avoid common issues and ensure your stepper motor performs optimally, follow these best practices when setting up your A4988 stepper motor driver:
- Ensure Proper Power Supply: Make sure that the power supply to the A4988 is stable and provides the correct voltage and current for both the driver and motor.
- Use Heatsinks and Cooling: To prevent overheating, use heatsinks or active cooling like a fan to dissipate heat from the driver.
Double-Check Wiring: Always ensure that your wiring is correct before powering up the system. Proper connections prevent issues like stuttering or failure to move.
Troubleshooting Common Issues with the A4988 Stepper Motor Driver
Checking Wiring Connections
Verifying all electrical connections is the first step in resolving any motor driver issue. Motor failure can result from even minor errors, such as improper pin placement.

Answer: Verify that every wire is connected to the correct pin by comparing the wiring to the A4988 datasheet. Check for any shorts or loose connections.
Adjusting Current Limit and Voltage Settings
Incorrect current limiting is another frequent problem that results in inconsistent motor performance. The driver may overheat if the engine is drawing excessive current. Conversely, a motor that has too little current may not have enough torque.
Solution: Examine and modify the A4988’s current limiting screw using a multimeter. Make sure your rates for voltage and current correspond to the stepper motor’s specs.
Understanding Microstepping Settings
Motor movement that is jerky or loud may result from improper microstepping settings. Make sure you have the right setup for your application if you’re utilizing microstepping to lessen motor vibrations .
Answer: Examine the microstepping setup of the A4988 and modify the jumper pins as necessary. Set the microstepping mode to 1/16 step for smoother action, but be mindful of the torque and speed trade-off.
A4988 Stepper Motor Driver vs DRV8825: Which One Is Right for You?
The DRV8825 is another well-liked stepper motor driver, even though the A4988 is a fantastic option for many applications. The DRV8825 might be a better choice if you want to handle larger currents or more torque.

Solution: The DRV8825 is a good option if you need more precise control or are working with high-current motors. The A4988 is still a dependable and reasonably priced option for common applications.
Now that you’ve learned how to troubleshoot common issues with your A4988 stepper motor driver,
it’s time to optimize your setup! Check out our guide on advanced stepper motor control techniques or browse our stepper motor selection to find the perfect match for your next project.
Need more assistance? Contact us today for expert advice and support
FAQs: Your Questions, Answered
8V-35V. Perfect for most hobby motors!
Turn the potentiometer with a screwdriver while measuring the voltage (see formula: V ref=Imax×0.1V ref=Imax×0.1).
Yes! It’s ideal for NEMA 17 (1.2A-2A) motors.
Check wiring or increase the current limit slightly.
Conclusion: Ready to Power Your Projects?
You may fix frequent problems with the A4988 stepper motor driver and guarantee smooth performance for your projects by adhering to the suggested fixes and best practices. Remember to look through our other stepper motor control and troubleshooting materials to maintain optimal system performance.


3 thoughts on “Common Issues with A4988 Stepper Motor Driver and Solutions| Troubleshooting Tips”